In this walkthrough we will create a simple React app (using Create React App), add a simple amCharts 4 bar chart to it, and then add amCharts Editor 4, and wire it up to edit this simple chart.
Follow along or just lookup the sections you are interested in below.
Create React App
Let’s create a simple React app as the basis for our project. We will use Create React App for this.
npx create-react-app my-react-editor-app --template typescript
cd my-react-editor-app
Note: we are using TypeScript in this walkthrough but feel free to remove the “--template typescript” part from the command above and just omit type declarations in the code examples below.
We will use class components in this walkthrough. So, we will start with this barebone App.tsx (App.js, if you aren’t using TypeScript).:
import React, { Component } from 'react';
import './App.css';

class App extends Component {
  render() {
    return (
      <div className="App">
        <h1>amCharts Editor 4 Demo.</h1>
      </div>
    );
  }
}

export default App;
Adding amCharts 4
It’s time to add amCharts to our project. From the terminal run:
npm install @amcharts/amcharts4
or
yarn add @amcharts/amcharts4
Add imports for amCharts classes to App.tsx (App.js):
import * as am4core from '@amcharts/amcharts4/core';
import * as am4charts from '@amcharts/amcharts4/charts';
import '@amcharts/amcharts4/charts';
Note: That last line is only needed here because in our simple example we are not explicitly using anything from am4charts and it gets “optimized” out of the final bundle. In a more advanced application you would likely use classes from am4charts and this “workaround” won’t be necessary.
Now let’s setup our component to show the chart.
We need to do 4 things:
- Define fields to store our chart and chart configuration.
- Set initial chart configuration;
- Add a div to host our chart (in render()).
- Create our chart in
componentDidMount()and dispose of it incomponentWillUnmount()
IMPORTANT For performance considerations amCharts performs some operations directly on the passed configuration object. For this reason, in cases when you need the configuration to remain intact after rendering a chart, you should never pass a chart configuration object directly to am4core.createFromConfig() and pass a copy instead.
At this stage your App.tsx (App.js) should look something like this:
import React, { Component } from 'react';
import './App.css';

import * as am4core from '@amcharts/amcharts4/core';
import * as am4charts from '@amcharts/amcharts4/charts';
import '@amcharts/amcharts4/charts';

class App extends Component {
  private chart?: am4core.Sprite;

  private chartConfiguration: object = {
    "type": "XYChart",
    "data": [{
        "category": "Category #1",
        "value": 4032
    }, {
        "category": "Category #2",
        "value": 724
    }, {
        "category": "Category #3",
        "value": 4015
    }, {
        "category": "Category #4",
        "value": 4232
    }],
    "xAxes": [{
        "type": "ValueAxis",
        "renderer": {
            "maxLabelPosition": 0.98
        }
    }],
    "yAxes": [{
        "type": "CategoryAxis",
        "dataFields": {
            "category": "category"
        },
        "renderer": {
            "grid": {
                "template": {
                    "type": "Grid",
                    "location": 0
                }
            },
        }
    }],
    "series": [{
        "type": "ColumnSeries",
        "columns": {
            "template": {
                "type": "Column",
                "strokeOpacity": 0,
                "tooltipText": "{categoryY}\n{valueX}",
                "tooltipPosition": "pointer"
            }
        },
        "dataFields": {
            "valueX": "value",
            "categoryY": "category"
        },
    }]
  };

  componentDidMount() {
    this.chart = am4core.createFromConfig(
      // IMPORTANT: for performance considerations amCharts performs some
      // operations directly on the passed configuration object. For this
      // reason, in cases when you need the configuration to remain intact
      // after rendering a chart, you should never pass a chart configuration
      // object directly to am4core.createFromConfig and pass a copy instead.
      JSON.parse(JSON.stringify(this.chartConfiguration)),
      'chartdiv'
    );
  }

  componentWillUnmount() {
    if (this.chart) {
      this.chart.dispose();
    }
  }

  render() {
    return (
      <div className="App">
        <h1>amCharts Editor 4 Demo.</h1>
        <div id="chartdiv" style={{ width: '800px', height: '460px', margin: '20px auto'}}></div>
      </div>
    );
  }
}

export default App;
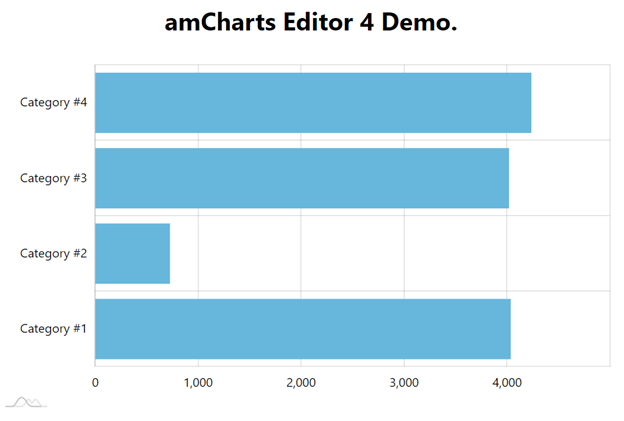
And your app should look something like this when launched:
Adding amCharts Editor 4
Now it’s time to add and setup amCharts Editor 4.
First we add it to our project. Run:
npm install @amcharts/editor4
or
yarn add @amcharts/editor4
The Editor is library-app combination (more on this here) so we need an extra step to include the app part in our project.
For this first let’s add ncp to our project:
npm install ncp
or
yarn add ncp
ncp is just a utility that would help us copy the Editor application to the output of our build process.
Now, let’s modify our build scripts in package.json. We need to copy the Editor app files to the public directory of our app and include this step in our build and dev scripts. So the “scripts” section of your package.json has to look like this:
  "scripts": {
    "copy-editor": "ncp ./node_modules/@amcharts/editor4/am4editor ./public/am4editor",
    "start": "yarn copy-editor && react-scripts start",
    "build": "yarn copy-editor && react-scripts build",
  },
You may also want to add “/public/am4editor” to your .gitignore.
Launching amCharts 4 Editor
To edit the chart on our page we will:
- Import the Editor library.
- Add a button to let user initiate the editing and wire its click event to a method of our component.
- In this method we will instantiate an instance of the EditorLauncher.
- Launch it with our current chart configuration.
Add this import statement to the top of App.tsx (App.js):
import * as am4editor from '@amcharts/editor4';
Then just add a button to your render output:
<button onClick={this.editChart}>edit chart</button>
And, obviously, we need to define that editChart() method:
private launcher?: am4editor.EditorLauncher;

  editChart() {
    this.launcher = new am4editor.EditorLauncher();
    this.launcher.launch(this.chartConfiguration);
  }
Here we create an instance of EditorLauncher and launch passing our chart configuration.
Note: make sure “this” in editChart() refers to our component by adding this.editChart = this.editChart.bind(this); to the constructor.
At this point your complete App.tsx (App.js) should look something like this:
import React, { Component } from 'react';
import './App.css';

import * as am4core from '@amcharts/amcharts4/core';
import * as am4charts from '@amcharts/amcharts4/charts';
import '@amcharts/amcharts4/charts';

import * as am4editor from '@amcharts/editor4';

class App extends Component {
  private chart?: am4core.Sprite;
  private launcher?: am4editor.EditorLauncher;

  private chartConfiguration: object = {
    "type": "XYChart",
    "data": [{
        "category": "Category #1",
        "value": 4032
    }, {
        "category": "Category #2",
        "value": 724
    }, {
        "category": "Category #3",
        "value": 4015
    }, {
        "category": "Category #4",
        "value": 4232
    }],
    "xAxes": [{
        "type": "ValueAxis",
        "renderer": {
            "maxLabelPosition": 0.98
        }
    }],
    "yAxes": [{
        "type": "CategoryAxis",
        "dataFields": {
            "category": "category"
        },
        "renderer": {
            "grid": {
                "template": {
                    "type": "Grid",
                    "location": 0
                }
            },
        }
    }],
    "series": [{
        "type": "ColumnSeries",
        "columns": {
            "template": {
                "type": "Column",
                "strokeOpacity": 0,
                "tooltipText": "{categoryY}\n{valueX}",
                "tooltipPosition": "pointer"
            }
        },
        "dataFields": {
            "valueX": "value",
            "categoryY": "category"
        },
    }]
  };

  constructor(props: any) {
    super(props);
    this.editChart = this.editChart.bind(this);
  }

  componentDidMount() {
    this.chart = am4core.createFromConfig(
      // IMPORTANT: for performance considerations amCharts performs some
      // operations directly on the passed configuration object. For this
      // reason, in cases when you need the configuration to remain intact
      // after rendering a chart, you should never pass a chart configuration
      // object directly to am4core.createFromConfig and pass a copy instead.
      JSON.parse(JSON.stringify(this.chartConfiguration)),
      'chartdiv'
    );
  }

  componentWillUnmount() {
    if (this.chart) {
      this.chart.dispose();
    }
  }

  editChart() {
    this.launcher = new am4editor.EditorLauncher();
    this.launcher.launch(this.chartConfiguration);
  }

  render() {
    return (
      <div className="App">
        <h1>amCharts Editor 4 Demo.</h1>
        <div id="chartdiv" style={{ width: '800px', height: '460px', margin: '20px auto'}}></div>
        <button onClick={this.editChart}>edit chart</button>
      </div>
    );
  }
}

export default App;
And now the editor should open when you click on the “edit chart” button. There’s just one step missing – we need to handle the edited chart returned from the editor.
Getting the edited chart
First let’s handle the event for when a user just closes the Editor without saving. We can do it inline by adding a handler right in the editChart() method:
    this.launcher.addEventListener('close', () => {
      if (this.launcher) {
        this.launcher.close();
      }
    });
Next let’s handle the “save” event:
    this.launcher.addEventListener('save', (ev) => {
      if (ev) {
        this.chartConfiguration = ev.chartConfig;
        this.renderChart();
        if (this.launcher) {
          this.launcher.close();
        }
      }
    });
Here we assign the chart configuration we get from the Editor to our configuration field and re-render chart. We have moved the chart rendering code to its own method so we can call the same method from both componentDidMount() and our ‘save’ event handler. And don’t forget to close the editor after that.
Now our basic chart editing example is complete and here’s the complete code for App.tsx (App.js)
import React, { Component } from 'react';
import './App.css';

import * as am4core from '@amcharts/amcharts4/core';
import * as am4charts from '@amcharts/amcharts4/charts';
import '@amcharts/amcharts4/charts';

import * as am4editor from '@amcharts/editor4';

class App extends Component {
  private chart?: am4core.Sprite;
  private launcher?: am4editor.EditorLauncher;

  private chartConfiguration: object = {
    "type": "XYChart",
    "data": [{
        "category": "Category #1",
        "value": 4032
    }, {
        "category": "Category #2",
        "value": 724
    }, {
        "category": "Category #3",
        "value": 4015
    }, {
        "category": "Category #4",
        "value": 4232
    }],
    "xAxes": [{
        "type": "ValueAxis",
        "renderer": {
            "maxLabelPosition": 0.98
        }
    }],
    "yAxes": [{
        "type": "CategoryAxis",
        "dataFields": {
            "category": "category"
        },
        "renderer": {
            "grid": {
                "template": {
                    "type": "Grid",
                    "location": 0
                }
            },
        }
    }],
    "series": [{
        "type": "ColumnSeries",
        "columns": {
            "template": {
                "type": "Column",
                "strokeOpacity": 0,
                "tooltipText": "{categoryY}\n{valueX}",
                "tooltipPosition": "pointer"
            }
        },
        "dataFields": {
            "valueX": "value",
            "categoryY": "category"
        },
    }]
  };

  constructor(props: any) {
    super(props);
    this.editChart = this.editChart.bind(this);
  }

  componentDidMount() {
    this.renderChart();
  }

  componentWillUnmount() {
    if (this.chart) {
      this.chart.dispose();
    }
  }

  renderChart() {
    if (this.chart) {
      this.chart.dispose();
    }

    this.chart = am4core.createFromConfig(
      // IMPORTANT: for performance considerations amCharts performs some
      // operations directly on the passed configuration object. For this
      // reason, in cases when you need the configuration to remain intact
      // after rendering a chart, you should never pass a chart configuration
      // object directly to am4core.createFromConfig and pass a copy instead.
      JSON.parse(JSON.stringify(this.chartConfiguration)),
      'chartdiv'
    );
  }

  editChart() {
    this.launcher = new am4editor.EditorLauncher();
    this.launcher.addEventListener('close', () => {
      if (this.launcher) {
        this.launcher.close();
      }
    });
    this.launcher.addEventListener('save', (ev) => {
      if (ev) {
        this.chartConfiguration = ev.chartConfig;
        this.renderChart();
        if (this.launcher) {
          this.launcher.close();
        }
      }
    });
    this.launcher.launch(this.chartConfiguration);
  }

  render() {
    return (
      <div className="App">
        <h1>amCharts Editor 4 Demo.</h1>
        <div id="chartdiv" style={{ width: '800px', height: '460px', margin: '20px auto'}}></div>
        <button onClick={this.editChart}>edit chart</button>
      </div>
    );
  }
}

export default App;
And this wraps our simple walkthrough. Check out the general guide, samples, and class reference for more details and advanced features.
Useful links: