This tutorial will explain how layering functionality works in amCharts 5.
What are layers?
All visual elements in amCharts 5 are drawn in a <canvas> element, which is a high-speed way to display graphics.
amCharts 5 supports having multiple <canvas> elements, overlaid over each other.
Any element in the chart can go to any of the layers, and developers are free to create as many layers as needed.
There is a couple of reasons for moving elements to other layers:
- To ensure they are displayed over other elements.
- To increase performance by moving elements that are updated often to a separate layer, so that when they are updated, the whole chart does not need to be re-rendered, but rather those elements in specific layer.
Layers are represented by an integer number. Layers with higher number will be displayed on top of ones with lower numbers.
In essence, layers work similarly like zIndex property works in CSS.
Hardcoded layers
Most of the chart elements are drawn in a "base layer" (or layer 0 - zero).
However, some of them are moved to other levels by default.
The following table lists a few examples of default layer assignment.
| Element | Default layer |
|---|---|
| Legend | 30 |
| Zoom button | 30 |
| Scrollbar | 30 |
| Tooltips | 30 |
| Tooltips (if used with extended bounds) | 35 |
| Cursor on an XY Chart | 30 |
| Panel controls of a Stock Chart | 30 |
Assigning a layer to elements
To assign a layer to a specific element, we can use its layer setting.
If there's no such layer created already, it will be created automatically.
The following example moves axis tooltip to a lower layer than other tooltips (30 by default), so that it does not overlap them:
let xAxis = chart.xAxes.push(am5xy.DateAxis.new(root, {
  // ...
  tooltip: am5.Tooltip.new(root, {
    layer: 10
  })
}));
var xAxis = chart.xAxes.push(am5xy.DateAxis.new(root, {
  // ...
  tooltip: am5.Tooltip.new(root, {
    layer: 10
  })
}));
Out-of-bounds layers
Normally, layers are sized exactly to the width and height of the container of the Root element.
This means that all elements that go outside those bounds, will be cut off.
It works for most charts in that all of the information is contained withing chart's bounds.
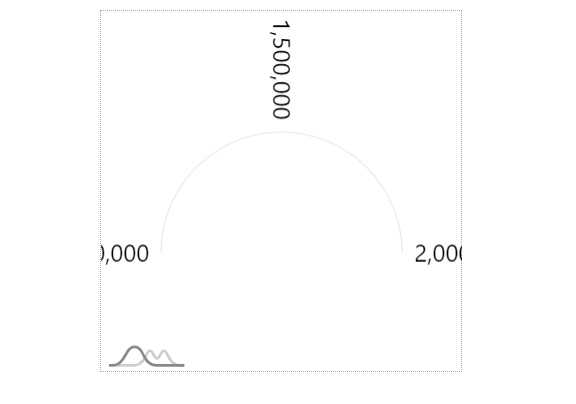
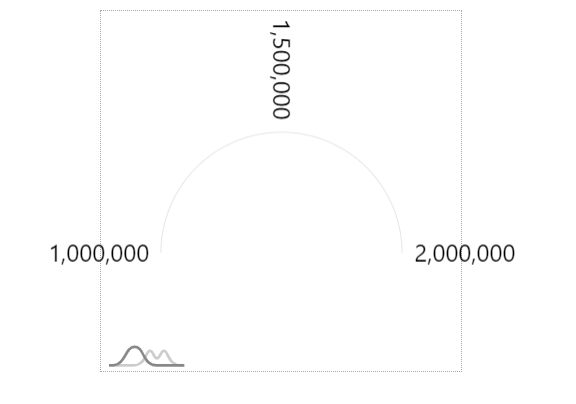
However, in some cases, we'd rather have elements bleeding out of the bounds than have them cut off.
amCharts 5 provides a way to specify extended bounds for particular layers using layerMargin setting.
The layerMargin accepts an object which specifies extended margins for top, right, left, and bottom.
axisRenderer.labels.template.setAll({
  layer: 20,
  layerMargin: { left: 50, right: 50, top: 0, bottom: 0 }
});
axisRenderer.labels.template.setAll({
  layer: 20,
  layerMargin: { left: 50, right: 50, top: 0, bottom: 0 }
});
The above code will add extra 50 pixels to left and right sides of the layer 20, so any elements contained in it - in this case axis labels - will have a bit of an extra space.
layerMarginPrecautions
Important thing to know when using layers is that each new layer will create a full-size <canvas> element.
Those elements will take up memory, and in some browsers (e.g. Safari) might hit a hardcoded RAM usage limit, resulting in chart render anomalies.
Use layers sparingly!