This tutorial looks at configuration options for data export with Exporting plugin.
Setting data to export
In order for exporting plugin to be able to export data, we need to set its dataSource setting.
It can be any array of objects, but most probably we'll want to set it to the same value we are using to feed data to series.
let exporting = am5plugins_exporting.Exporting.new(root, {
  menu: am5plugins_exporting.ExportingMenu.new(root, {}),
  dataSource: data
});
var exporting = am5plugins_exporting.Exporting.new(root, {
  menu: am5plugins_exporting.ExportingMenu.new(root, {}),
  dataSource: data
});
If dataSource is set, export menu will automatically include data-related exports, like CSV and XLSX.
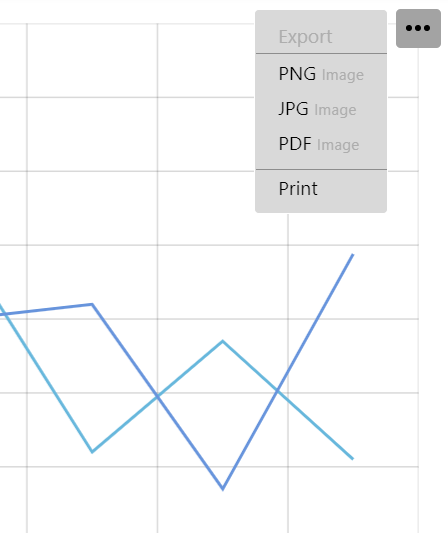
dataSource not set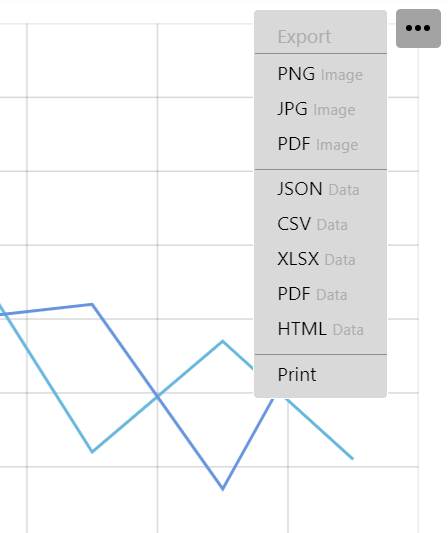
dataSource is setNumeric values
Normally, the plugin will export values as they are in data.
We can specify which fields in data hold numeric values and what format to use to format them using numericFields setting, which is an array of keys, as well as numberFormat setting which specify number format to use.
let exporting = am5plugins_exporting.Exporting.new(root, {
  menu: am5plugins_exporting.ExportingMenu.new(root, {}),
  dataSource: data,
  numericFields: ["value", "value2"],
  numberFormat: "#,###.00"
});
var exporting = am5plugins_exporting.Exporting.new(root, {
  menu: am5plugins_exporting.ExportingMenu.new(root, {}),
  dataSource: data,
  numericFields: ["value", "value2"],
  numberFormat: "#,###.00"
});
NOTE Number format will not be applied when exporting to JSON format.
For available number formatting syntax, refer to "Formatting numbers" tutorial.
Date/time
Similarly, we can also use dataFields to specify keys in data holding date/time information, and dateFormat setting to use when formatting those values.
let exporting = am5plugins_exporting.Exporting.new(root, {
  menu: am5plugins_exporting.ExportingMenu.new(root, {}),
  dataSource: data,
  dateFields: ["date"],
  dateFormat: "yyyy-MM-dd"
});
var exporting = am5plugins_exporting.Exporting.new(root, {
  menu: am5plugins_exporting.ExportingMenu.new(root, {}),
  dataSource: data,
  dateFields: ["date"],
  dateFormat: "yyyy-MM-dd"
});
For available date/time formatting syntax, refer to "Formatting dates" tutorial.
Data columns
We can also control which columns and in what order data will be exported, as well as override column names using two settings dataFields and dataFieldsOrder.
dataFields is an object which identifies which columns to include (object key) and how to name their column (value).
If dataFields is set, only those columns that are included in it, will be exported. If it's not set, all columns from source data will be exported.
dataFieldsOrder is an array of keys. When exporting, the columns will be sorted in the same order as the keys in the dataFieldsOrder.
Contrary to dataFields, not including a column in dataFieldsOrder will not omit it from export, just place it at the end.
let exporting = am5plugins_exporting.Exporting.new(root, {
  menu: am5plugins_exporting.ExportingMenu.new(root, {}),
  dataSource: data,
  dataFields: {
    value: "Value (USD)",
    value2: "Value (EUR)",
    date: "Date"
  },
  dataFieldsOrder: ["value", "value", "date"]
});
var exporting = am5plugins_exporting.Exporting.new(root, {
  menu: am5plugins_exporting.ExportingMenu.new(root, {}),
  dataSource: data,
  dataFields: {
    value: "Value (USD)",
    value2: "Value (EUR)",
    date: "Date"
  },
  dataFieldsOrder: ["value", "value", "date"]
});
See the Pen Axis icons via ranges by amCharts team (@amcharts) on CodePen.
Altering data
Modifying source data
When exporting data, plugin will pre-process it: apply number/date formatting, sorting, column selection, etc.
Once that is done, plugin will invoke dataprocessed event, passing in processed data to possible event handlers.
At this point, we still have a chance to modify the data any way we want, e.g.:
exporting.events.on("dataprocessed", function(ev) {
  for(var i = 0; i < ev.data.length; i++) {
    ev.data[i].sum = ev.data[i].value + ev.data[i].value2;
  }
});
exporting.events.on("dataprocessed", function(ev) {
  for(var i = 0; i < ev.data.length; i++) {
    ev.data[i].sum = ev.data[i].value + ev.data[i].value2;
  }
});
The above will add an additional column "sum" to exported data, with automatically-calculated sum from two other columns in data.
See the Pen Exporting data by amCharts team (@amcharts) on CodePen.
NOTE Be careful modifying data dataSource reuses same variable as actual series on the chart. Altering data considerably might affect chart's appearance.
If we need to considerably alter data that is also used for series, we need to build a new array in dataprocessed handler, then assign it back to event.data:
exporting.events.on("dataprocessed", function(ev) {
  // This will override export data, but will not modify original data source
  ev.data = [{
    foo: "bar"
  }, {
    moo: "boo"
  }]
});
exporting.events.on("dataprocessed", function(ev) {
  // This will override export data, but will not modify original data source
  ev.data = [{
    foo: "bar"
  }, {
    moo: "boo"
  }]
});
Modifying XLSX
Export plugin uses SheetJS js-xlsx library to generate XLSX documents.
When export is initiated, an xlsx workbook is created and populated with formatting options and data.
Before it is converted to an actual xlsx file and streamed to user, an event kicks in: workbookready.
At this point, we can still modify contents of the document.
exporting.events.on("workbookready", function(event) {
  // Modify event.workbook which is an xlsx workbook
  // ...
});
exporting.events.on("workbookready", function(event) {
  // Modify event.workbook which is an xlsx workbook
  // ...
});
The event object passed into workbookready handler will contain three properties, that we may need to modify the output:
workbook- an XLSX workbook object.workbookOptions- XLSX workbook options.xlsx- an instance of XLSX library itself.
To modify contents of the output document, we'll need to modify properties of the event.workbook.
For complete information on how to populate workbook object, refer to SheetJS docs.
The following will add additional work sheet to output document:
exporting.events.on("workbookready", function(event) {
  event.workbook.SheetNames.push("Data 2");
  event.workbook.Sheets["Data 2"] = event.xlsx.utils.aoa_to_sheet([
    [ "Hello", "world" ],
    [ "Hello", "world" ],
    [ "Hello", "world" ],
  ]);
});
exporting.events.on("workbookready", function(event) {
  event.workbook.SheetNames.push("Data 2");
  event.workbook.Sheets["Data 2"] = event.xlsx.utils.aoa_to_sheet([
    [ "Hello", "world" ],
    [ "Hello", "world" ],
    [ "Hello", "world" ],
  ]);
});
See the Pen Custom PDF export by amCharts team (@amcharts) on CodePen.